Sound recording and how to use microphones.
- charlotte2006lr
- Jan 15, 2024
- 4 min read
Updated: Jan 17, 2024
When making and filming documentary's, there a range of different microphones we can use. However, even though there are lots of different types of microphones, some of them produce better audio quality than others.
We tested using a Zoom Mic, a mobile phone and a camera, and in this video you can listen to the audios recorded on each one. Looking at all three microphones they each offer different effects.
Looking at the zoom mic, I would would say that its outlined features would be that it picks up audio extremely well. This is because it focusses on the main source of audio and cuts majority of background noise out. I would say that this is good as it get the main thing you want to hear, however this does make audio slightly more grainy or unclear. For example, when looking at the audios of the people walking in leaves or the scream it is quite grainy and hard to listen to as it is so focussed on that one audio and making it louder. Whilst yes this is a pro it is also a con. However in audios like the plane it is clearer and if not told the audience would be able to tell it apart and say that that noise is a plane.
The mobile phone microphone in my opinion is better than the zoom mic as it is not as high quality so that the noise picked up is not as focussed. Looking at the audio clips used they tend to not be as grainy and hard to hear in comparison to the zoom mic. However, they are not at the same quality as the mobile microphone needs to be in a closer proximity to the source of noise to pick up the same audio quality as the zoom mic, and it will not isolate the audio as well. It also does get a lot of interference with the wind.
The microphone quality on the camera is interesting in comparison to the zoom mic and the mobile phone microphone. The microphone quality is not too bad in comparison to the zoom mic and mobile phone however it picks up any audio that is heard. This can be bad as the main noise or dialogue can often be lost and other unnecessary audio is heard. For example, I find this often happens with the wind and noise from transport in the area.
I think that overall the zoom mic is the best however does need to be used in certain conditions. I would use the zoom mic for dialogue and conversations as they pick up speech well, however I would say that this needs to be in a isolated environment as no wind or other audio could be heard. I think that the camera and mobile phone as well I would use inside so nothing else overlaps the audio you would want. I think the zoom mic would be the best for anything outside.
We used all three types of microphones outside which would make the difference. Using any of the three inside in a quiet environment would work well but outside has too much other noise that can ruin what you would want to be focussed on and heard.
How to use different microphones:
Mobile phone:
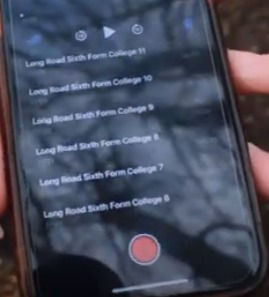
When recording on a phone you can use voice memos to record.
Start by making sure you know what specific audio you want to capture. We held the phone next to the audio subject and pressed the red button. This captures any audio that is heard. When done press the red button again and it will stop. When uploading it (we uploaded off our phones to then save to the computer and put into premier pro) I saved it on voice memos as a file and then sent the files through teams, this could also be done by email. I then downloaded them to the computer and saved them into a folder, I then edited them on Premier.
Zoom mic:

To use the zoom mic, you can adjust the settings to make audio level or louder, you do this by pressing the buttons on the front or side. Once you know what audio you need to pick up, hold or sit the zoom mic down and press the record button (silver one with the red dot) and it will pick up any audio that has been made. When you have finished recording press the button again. To upload to a computer, the SD card slot will be in the side. Flip the cover up and push the SD card in further into the zoom mic, this will make it come out. Put the SD card in an adapter and plug into the computer. Move this audio files to where you would like them and they are ready to use.
Camera:

When recording on a camera we just filmed what we wanted to capture. For example, one thing we recorded on each was dialogue. I spoke a paragraph of dialogue that we had been given and had the camera pointed at me. This allowed the microphone on the camera to pick up audio. When beginning recording we pressed the small button of the camera at the top right with the red dot. when pressed it will capture visuals and audios. When stopping recording just press the button again. When uploading to a computer, open the SD card slot and push the card in (to eject it) and take it out. Put the SD card in the card slot on the computer and move the files into a folder.
Comments